Installing WordPress on your computer locally helps you try out WordPress, test themes and plugins, and learn WordPress development without purchasing an external space on server.
In this article, we will show you how to easily create a local WordPress site Using XAMPP.
Reason to Create a Local WordPress Site?
Creating local WordPress sites is a common practice among developers and site owners. It allows you to test/create WordPress without creating an actual website on the internet.
Local websites that we create on XAMPP are only visible to you on your computer. You can try different WordPress themes and plugins, test their features, and learn the WordPress basics without having site on live web servers.
If you have already site on the internet then you can create local copy of your site so you can check latest updates or any features before we implement to our live site
Note : Local site only visible to you until you purchase web server space and specific domain for yours site
Having said that,let move toward the installation of WordPress site on localhost for windows or Mac computer
As we are using XAMPP for this article lets move towards little bit of introduction to the software and then installation
What is XAMPP?
For wordpress we need to setup PHP(Programming Language) and SQL(Database Manegment) softwares .So, with the XAMPP we can easily setup both very easily.
XAMPP is basically a software which create server environment locally in our computer .Which is available for both MAC and Windows PC.
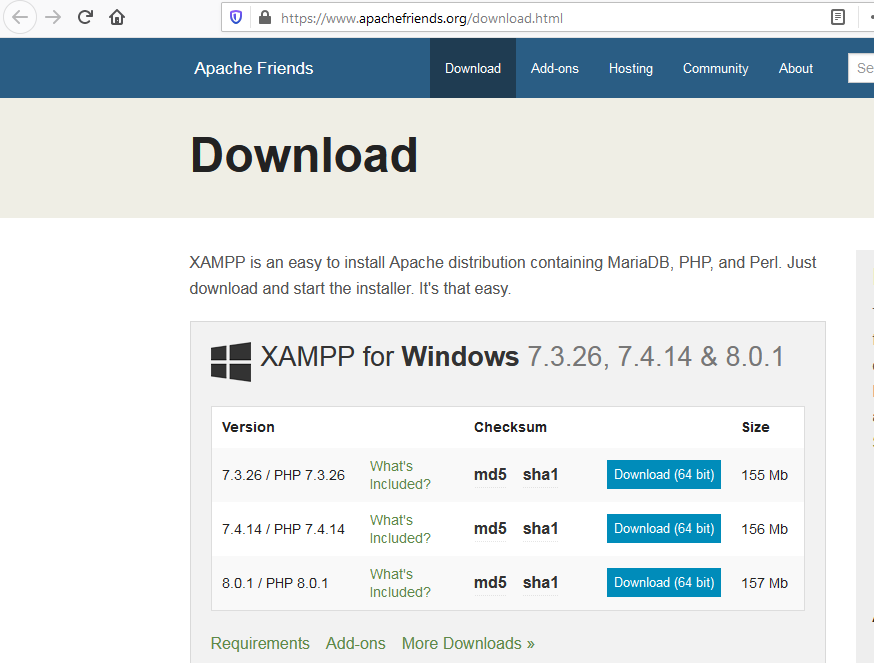
You can download latest version of XAMPP from : https://www.apachefriends.org/download.html
Installing XAMPP on Computer:
First of all download the latest version of XAMPP from the official site .Click on the download link depending on yours operating system you are using .
Note: For the sake of this article we are using windows system and also screenshot of installation and application interface maybe different .
After downloading the software you need to install the setup
XAMPP will ask where to install the software and which packages you’d like to install. The default settings will work for most users. Keep clicking on the ‘Next’ button to finish the setup wizard.
After finishing the wizard, check the ‘Start the control panel now’ option and then click on the finish button.
By doing this will open XAMPP control panel page .
And by using XAMPP app you can run Apache web server as local server and MYSQL as yours database now click on “Start” button next to it in order to run.
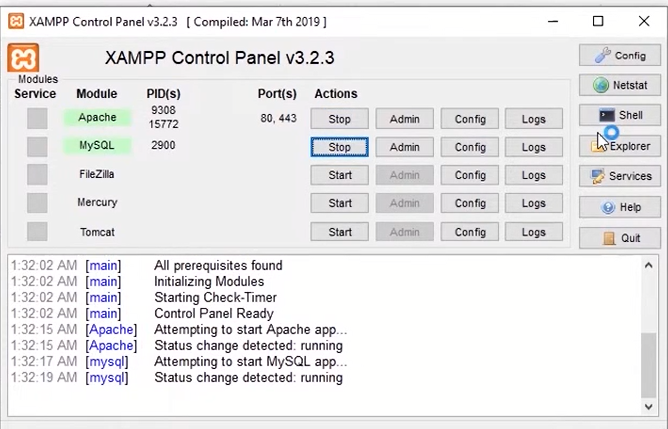
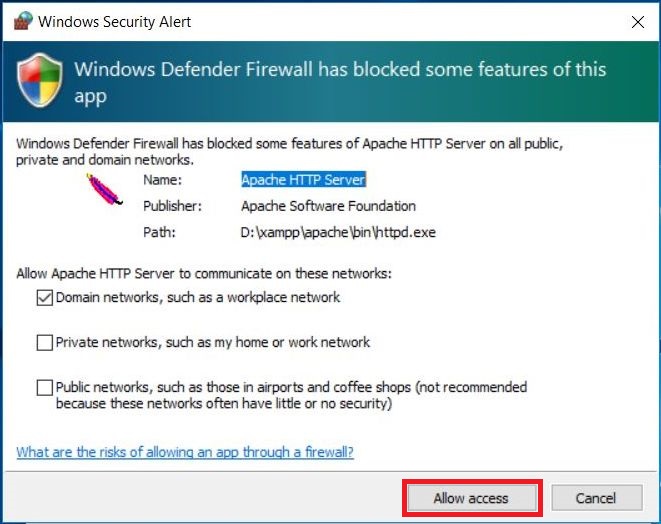
XAMPP will now start Apache and MySQL. You may see a Windows firewall notification first time only during new installation, it is important that you click on the ‘Allow Access’ button for both applications to run on your computer.
Now you are ready to create WordPress website locally
Creating a Local WordPress Site using XAMPP :
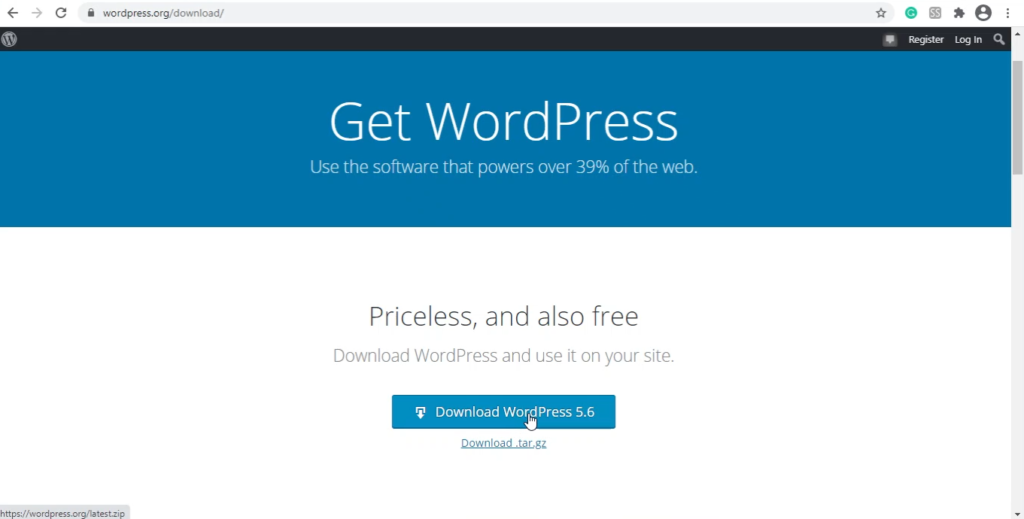
First ,visit the WordPress.org website and click on the ‘Download WordPress’ button to start downloading the latest version of WordPress
After downloading WordPress, you need to extract the zip file, and you will see a wordpress folder. You need to copy this folder.
On Windows it would be C:/Program Files/XAMPP/htdocs or C:/Xampp/htdocs folder.
Paste the wordpress folder you copied earlier inside htdocs.
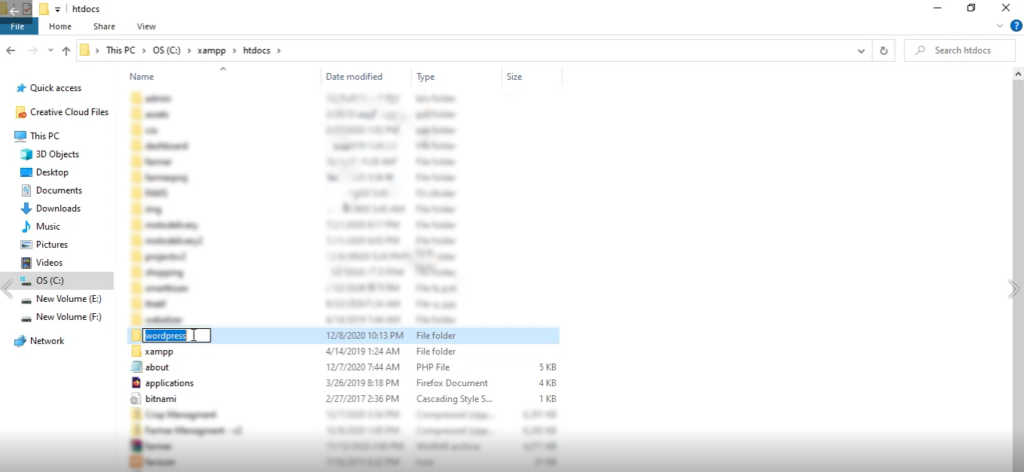
Also rename it according to your’s choice so you can easily identify it
Next, you need to open your favorite web browser and enter the following URL in your browser’s address bar.
https://localhost/(your folder name)
If you renamed the WordPress folder to something else, then replace (your folder name) with your own folder name.
In our case URL become https://localhost/wpdemo/
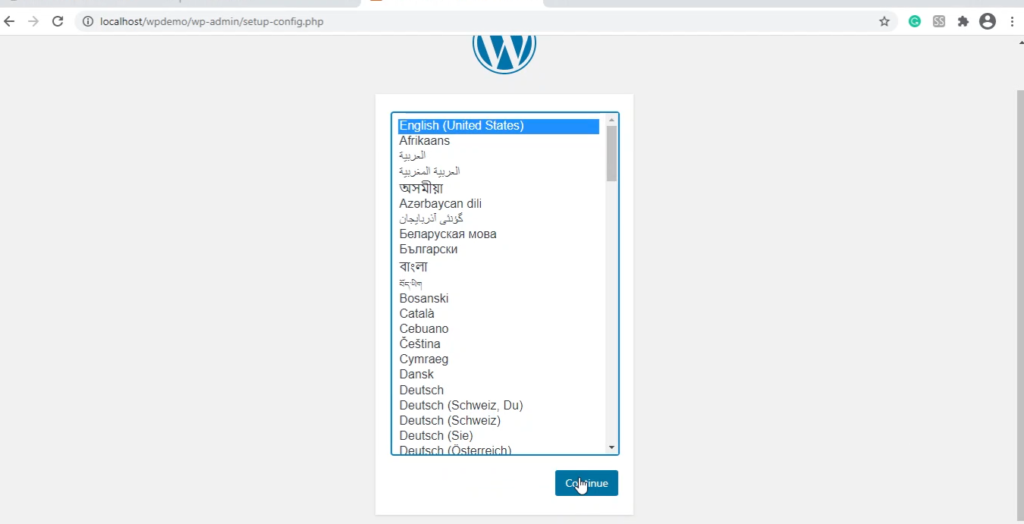
If yours previous steps are successful then this will load the WordPress installation wizard and you’ll be asked to select a language. After selecting a language, click on the ‘Continue’ button just like shown below
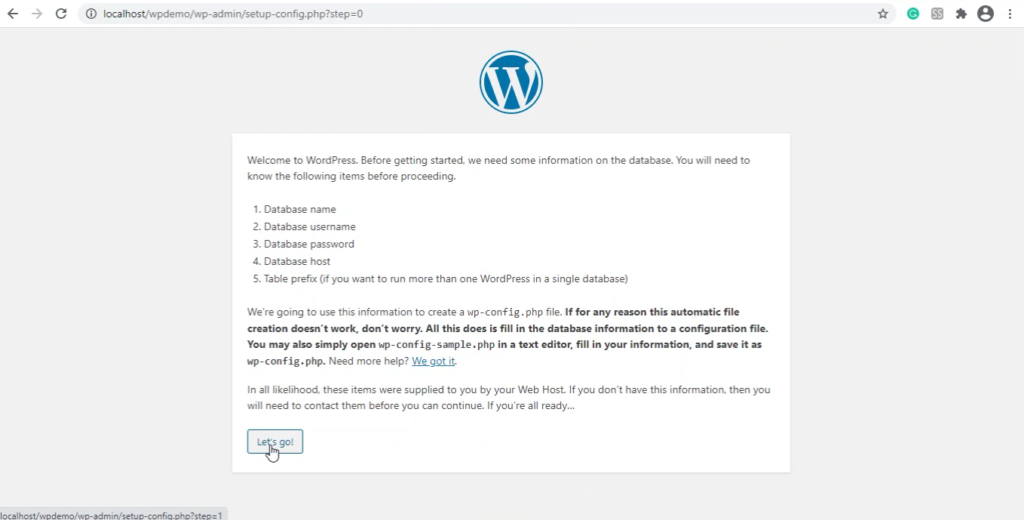
On the next step, you will see a notice that WordPress needs a database name, database username, password, and host information.
So , you have to create database of yours site in Xampp
Creating Database in Xampp :
For creating database you’ll need to open a new browser tab and visit https://localhost/phpmyadmin/.
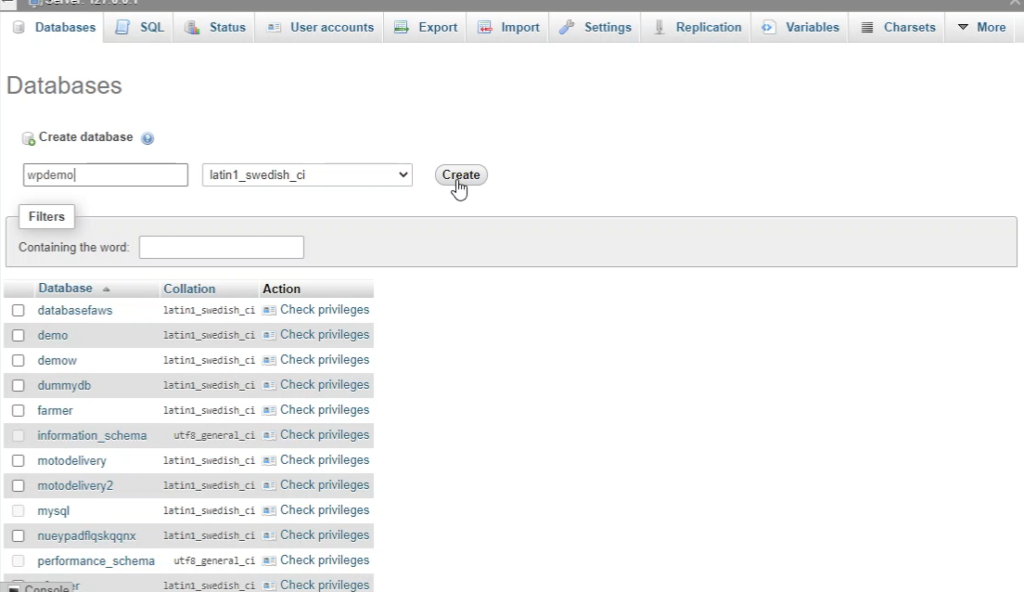
This will launch phpMyAdmin screen
On this screen head over to Databases tab and then there you will have to write database name for your site. In our case, we write wpdemo and then click on “Create”
Now that you have created a database successfully, you can use it for your WordPress site
Now head over to previous tab on yours browser i.e https://localhost/wpdemo and click on “Let’s Go”
On the next screen, you will be asked to provide your database information.
Enter the database name you created earlier. Your username is ‘root’ and you should leave the password field blank. For the database host field, you need to use localhost.
Note : The Default username of XAMPP is root and password is blank
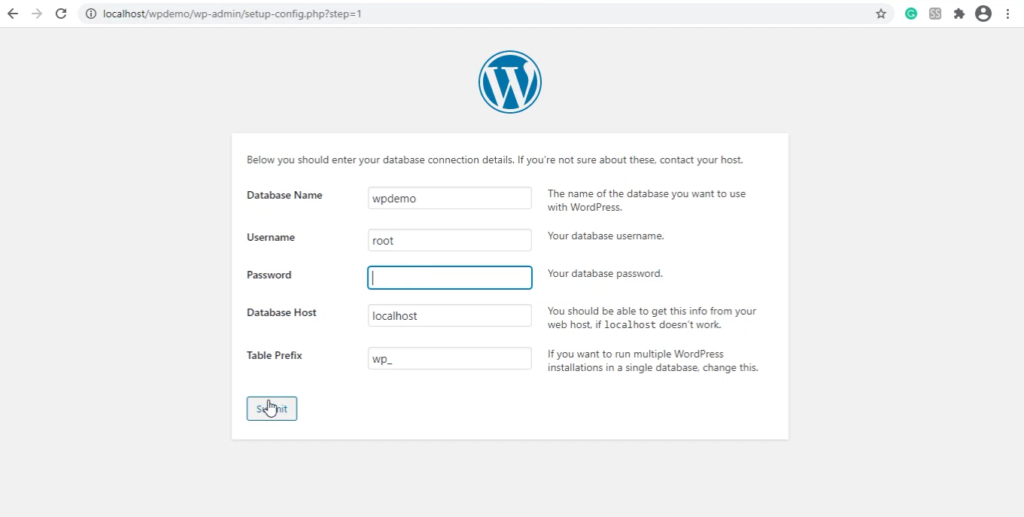
Once you are done, click on the ‘Submit’ button to continue to the next step.
In the next step, WordPress will ask you to provide basic information about your website so that they can setup it for you .Don’t worry you can change these setting later after you login
First, enter the title you want to use for this site.After that, you need to enter a username, password, and email address for your admin account.
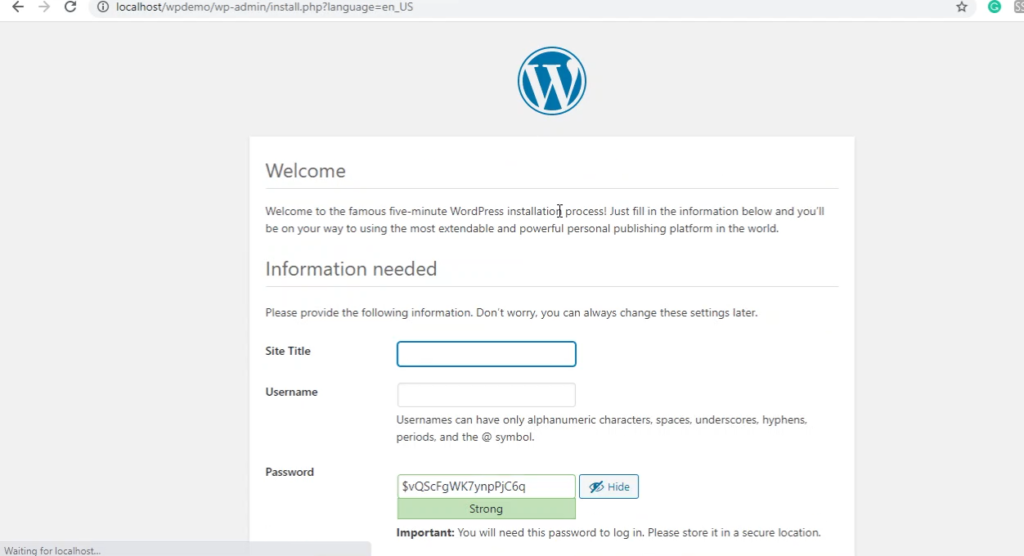
Once you have filled all the information, click on the ‘Install WordPress’ button to continue.
WordPress will now run the installation and prompt you to log in once it’s done.
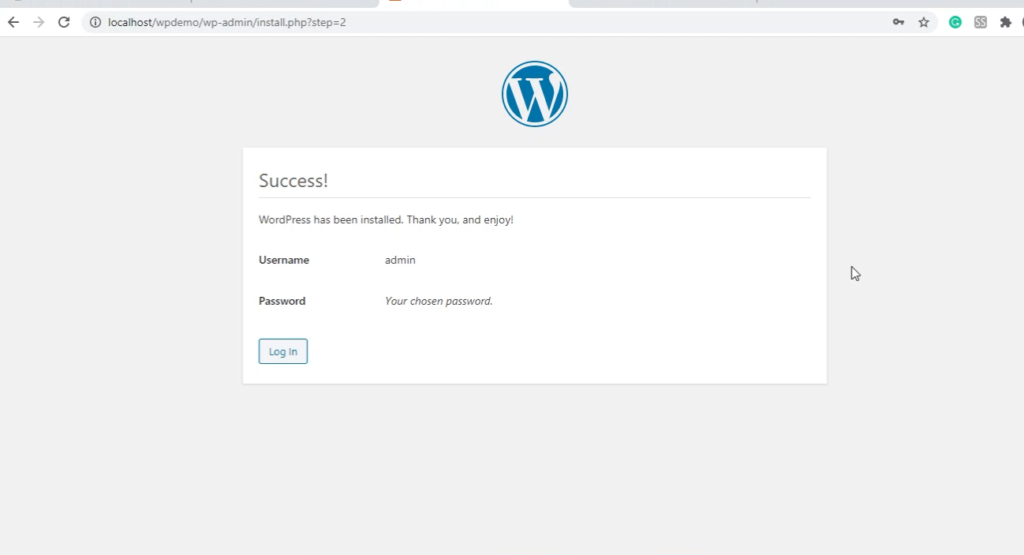
You can now login to your website by going to localhost/wpdemo/wp-admin page and use the username/password that you entered during installation to login.
If you liked this article, then please subscribe to our YouTube Channel for WordPress video tutorials and more. You can also find us on Twitter and Facebook.