Doing some work and saving it is not enough for us until we Export it to some final work in the form of an image.
As you know the image can be exported in many formats so in this method we are simply focused on How To Export image in PNG or JPG format in Photoshop for your understanding.
Before getting started you know about Opening a New File in Photoshop
So lets move towards our main topic
To Export image in Photoshop you must have to do some work in order to save it .
Lets just say we Open a File of Image in Photoshop
And want Export it as an Image i.e in JPG or PNG format. Then the method of Exporting it is
Method of Exporting an Image:
File >> Export >>Export As
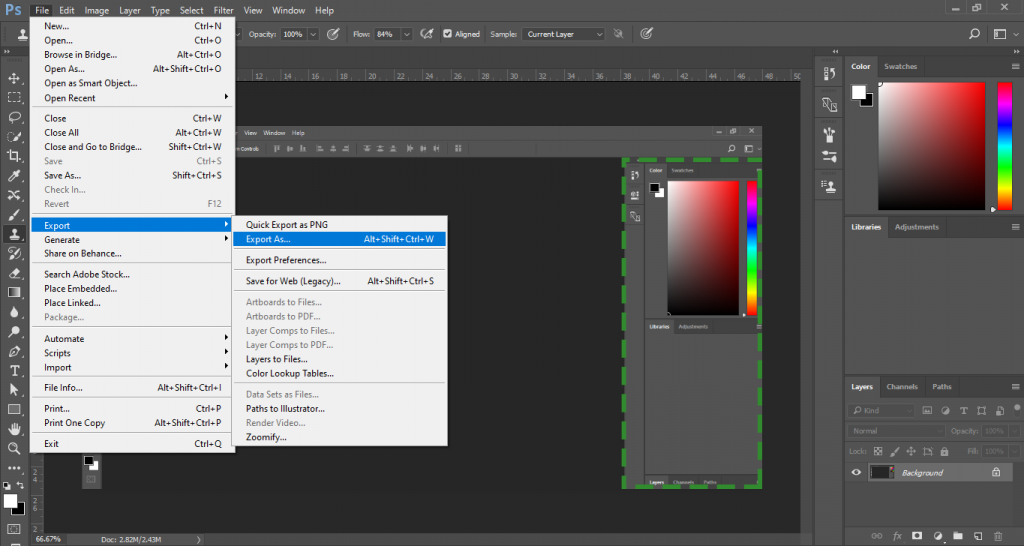
After Clicking on Export As following screen appear
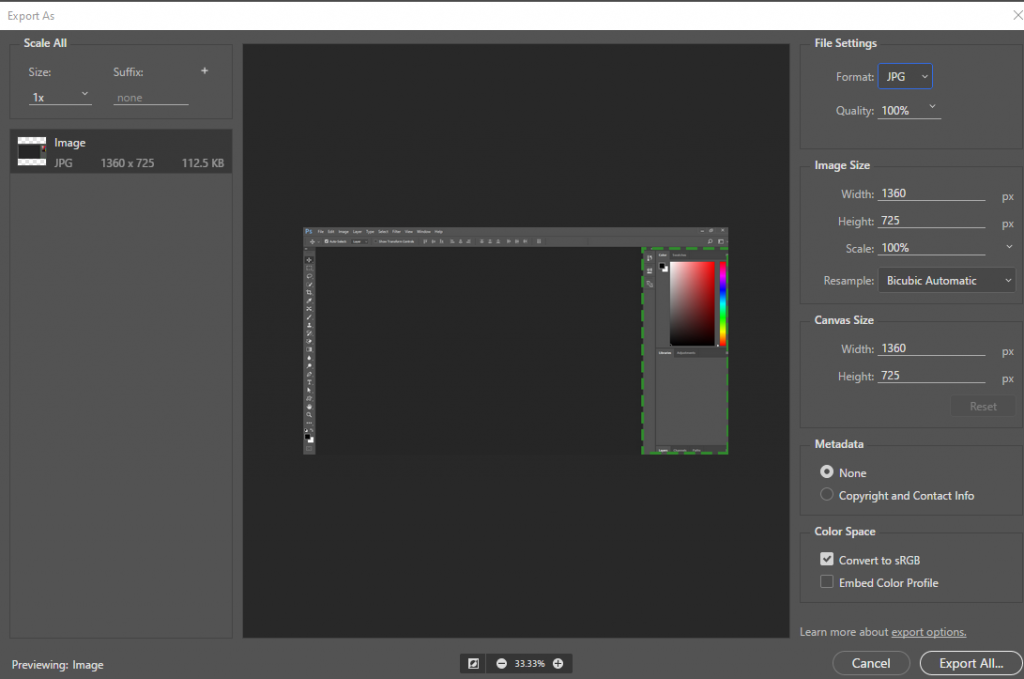
Select the File format in the right drop down menu .
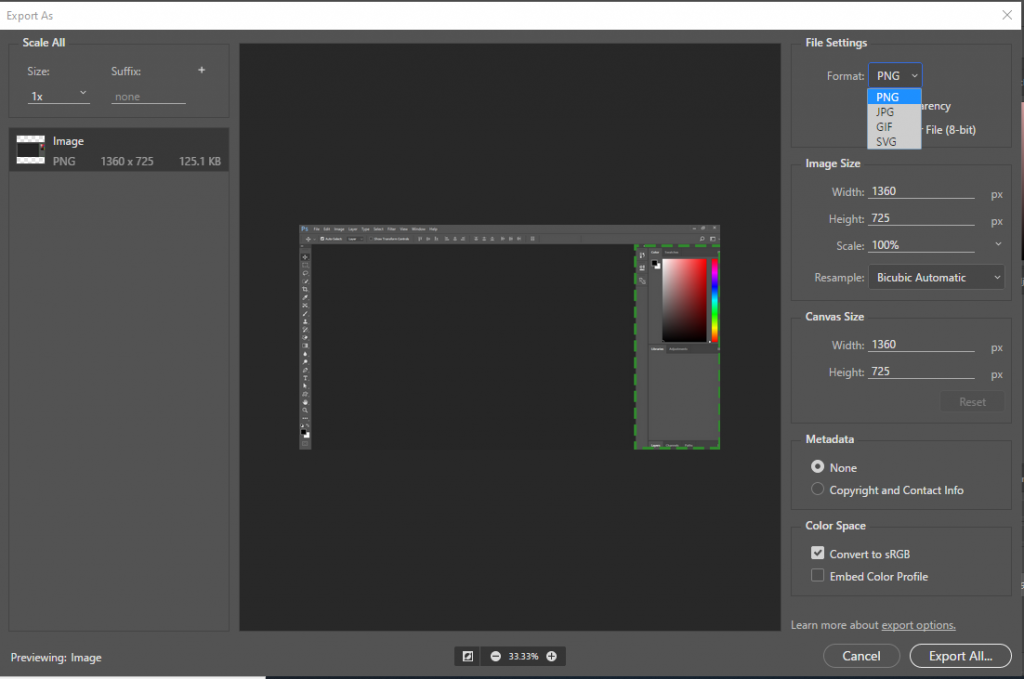

As i select JPG format to Export the image from the menu
Now Click on Export All button to Export image
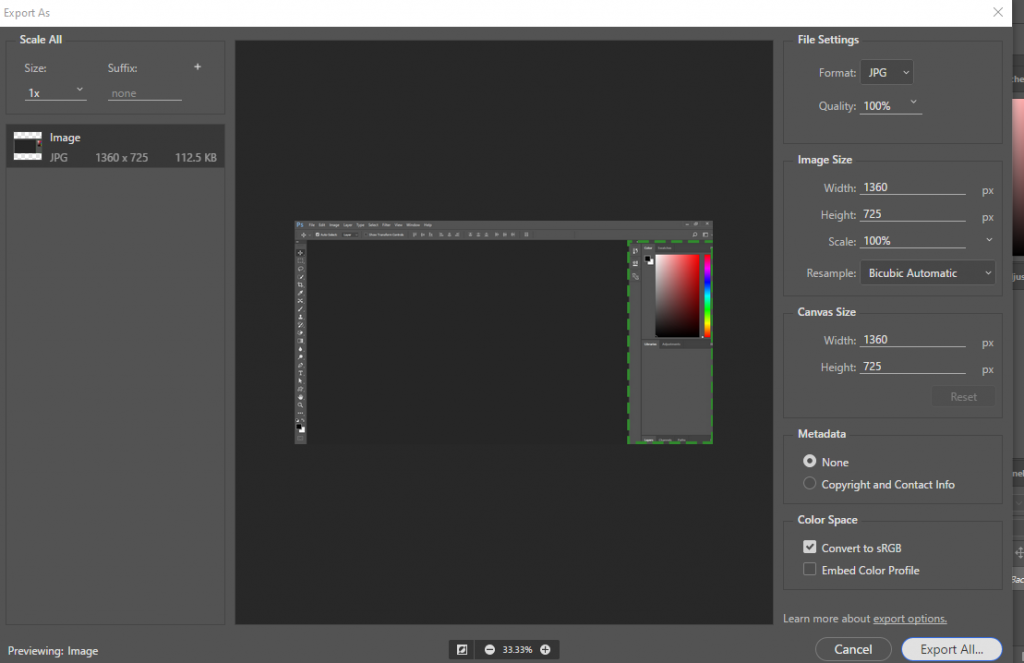
Now select the Destination Folder i,e Where you want to Save Image .
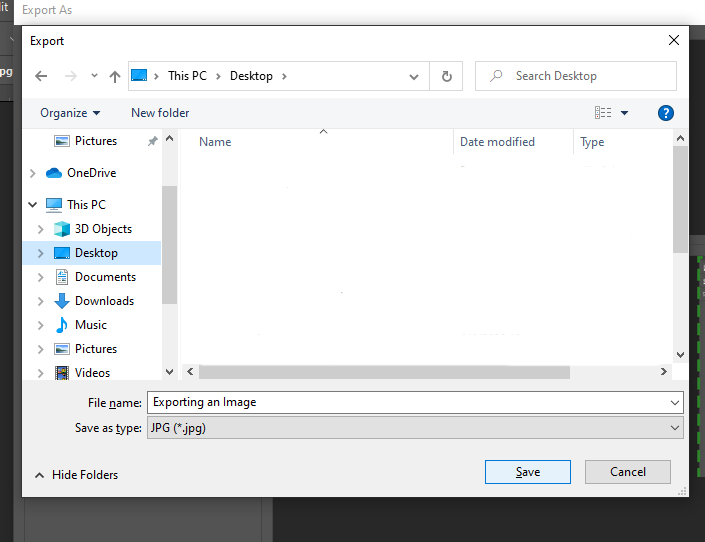
As i select Desktop as a destination of saving my image.And after selecting folder rename File Name of image
Note: You must save the file name properly in according with the name of your work so that you find it easily in future
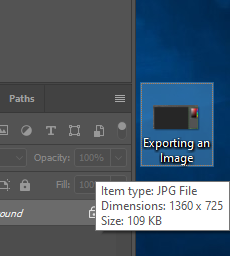
So , here is my Image Finally Exported
If you liked this article, then please subscribe to our YouTube Channel for Photoshop video tutorials and more. You can also find us on Twitter and Facebook.